For better ranking and indexing, SEO is the major factor for any blog. WordPress Seo by Yoast is widely accepted and most recommended plugin for SEO. It is the complete Seo solution with all require features and options. We recommend it rather than All in one Seo Plugin. This article helps you how to install and setup WordPress SEO by Yoast and take advantage of WordPress search engine optimization.
A Guide for configuring WordPress Yoast SEO plugin
Features
- Verify the site in Google, Bing, Alexa, Pinterest and Yandex Webmaster Tools
- Post title, meta description and keywords meta box to change these on a per post basis.
- Hide RSD, WLW, Shortlinks and RSS from head
- Taxonomy (tag, category, author & custom) title and meta description support.
- Supports Facebook Open Graph, Twitter Card and Google Publisher
- Generate XML sitemap with Images and ping Search Engine.
- Easily Noindex or Nofollow pages, taxonomies or entire archives.
- Advance permalink control
- Breadcrumbs support
- RSS footer / header configuration.
- Import settings from other SEO plugins.
- Edit .htaccess files and robots.txt
- Hide date from Search engine snippets
- Google search result snippet previews.
- Focus keyword testing.
- Meta Robots configuration
How to Setup WordPress SEO Plugin by Yoast
First install and activate the Yoast Seo Plugin. If You are a beginner check this guide to install plugin.
Import Data from previous Plugin to Yoast:
If you are using another SEO plugin like all in one SEO plugin, HeadSpace2 or WooThemes SEO framework. Yoast provides an interface to import data from previous plugin to Yoast Seo plugin. Just go to SEO> Import & Export and select your previous SEO plugin from which you want to import settings. Check the box “Delete the old data after import? (recommended)” and click on import. Do remember Take a backup of your WordPress Database before import setting.
General Setting:
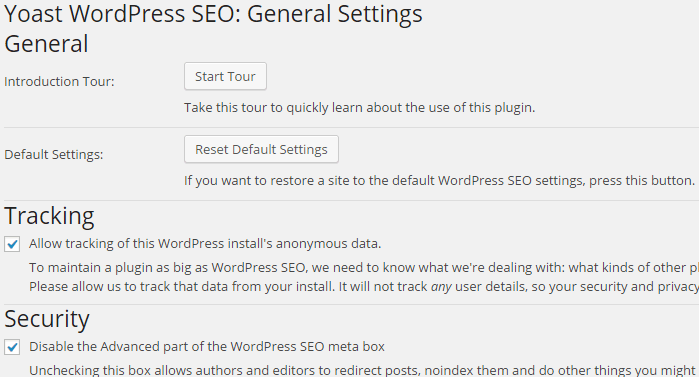
In General Setting first option is Start tour. It is a quick tour to know about the plugin. Here you can reset the plugin to default setting anytime. Tracking option sends anonymous usage data back to plugin author. If you don’t want to share this information uncheck this. The next option is Security, we recommend that you leave it checked. It will prevent your authors and editors to redirect posts, noindex them in case of multi-author site.
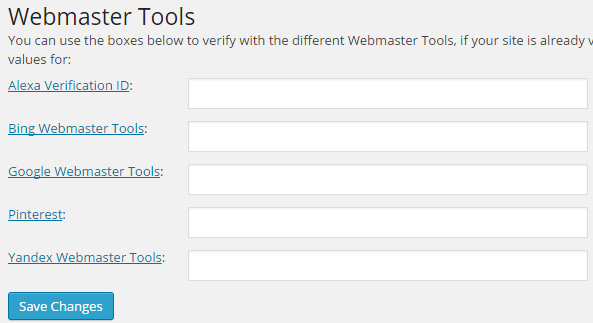
Now the next part is Webmaster Tools setting. Here you can add your Google, Bing, Alexa, Pinterest and Yandex Webmaster meta code to verify your site with these webmasters.
Titles and Meta Settings:
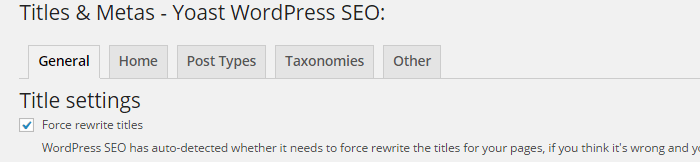
‘Titles and Meta setting’ is the most important part of Yoast. you can allow plugin to rewrite Title for your pages whether it needs to re-write or not. Under Sitewide meta setting We recommended you to check Noindex subpages of archive because these pages don’t add value to search results. After Google Panda update, Google prefers the quality rather than quantity. If you want to add meta keywords tag check this box. however, Google already made it official that they do not care about Keyword meta tag to ranking pages.

Above is the setting we use, Under Clean up <head> section you hide the RSD, WLW, Shortlink and RSS Link to clean up your Head section.
Home Title
You can choose the variables from Help tab to show your title.
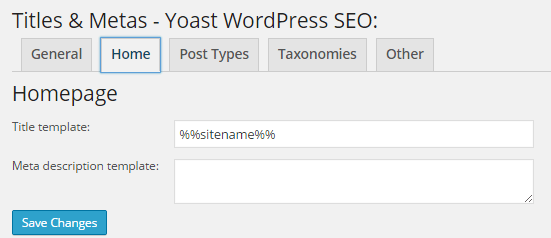
- Title template: Home title that you want to show in Google search.
- Meta Description: Your Homepage meta description for search engine.
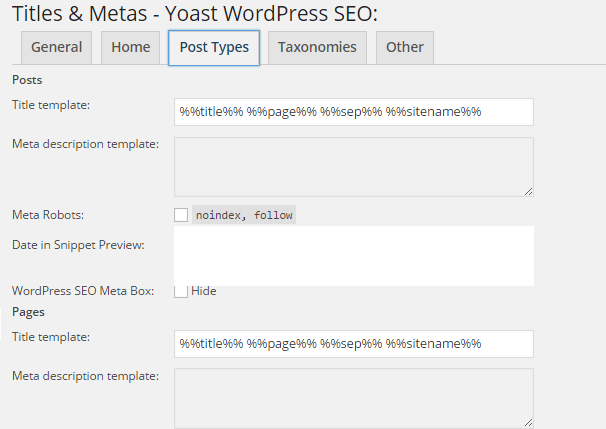
Post Type
You can define their own custom post types here and set titles and meta for posts, pages, media, and other custom post types. You can hide Date to show in snippet preview, which is useful for Evergreen content.
Taxonomies
We recommend you to check the box ‘noindex, follow’ for tag and format taxonomy. It is better to keep your taxonomy noindex but do follow by meta robots to save yours blog from duplicate content penalty.
Others
Here you set title and meta settings for author archives, date archives, search page, and 404 pages. We recommended that you check ‘noindex, follow’ for author and date archive and disable author archives for single author blogs to prevent duplicate content.
Social:
Yoast integrates your site with Facebook, Twitter, and Google+ Social platforms.

Under Facebook tab, you can add Open Graph meta data to your site <head> section. This will help Facebook pick up the right thumbnail and page information when your post is shared on Facebook. You can add the default image to show an image on Facebook, when your posts have no image.
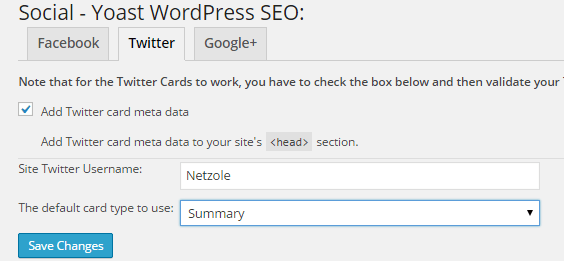
Here you can add Twitter card meta data to your site <head> section. add the username of your Twitter account. Under Google+ tab, you can add yours Google publisher page profile.
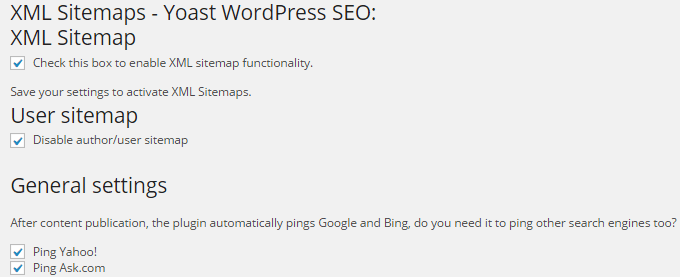
XML Sitemaps:
Sitemap is the easiest way to faster indexing. Yoast provides an interface to create sitemaps for your posts, pages, and images separately. Every time you publish a post, plugin includes it into the sitemaps and ping the search engines automatically. Here you can define the entry for each sitemap.
Permalinks:
This is the advanced permalink setting which provide more option to you besides WordPress basic permalink setting.
- By checking the first box, you can strip the /category/ from your category URLs. just like
Default: http:/mydomain.com/category/food
After Strip: http:/mydomain.com/food - If you have .html at the end of your posts and WordPress add / at the end of URL, then you can remove / by checking this option.
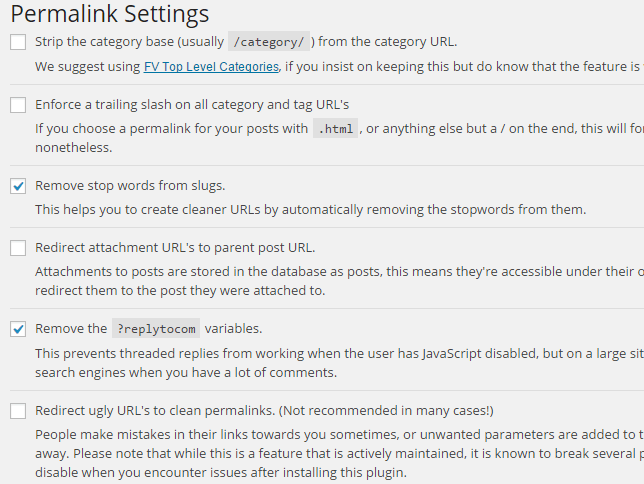
- Stop words are the common words used in simple language. By checking this box Yoast removes those words from URL and create short URL. for example
Default: http://mydomain.com/price-and-reviews
After Strip : http://mydomain.com/price-reviews - By checking this box, you redirect all your attachment page URL to the original post URL such as media URL.
- Here you can get rid of ‘?replytocom’ variable from comment reply links. We recommended always check this option for SEO benefit.
- Leave this box empty. It redirects the ugly URL’s to clean permalinks.
Internal Links:
Here you can enable breadcrumbs on your site. It helps the search engines to understand your site structure and provide easy navigation to site users. If your theme has this option you don’t need to check this option.
RSS Feeds:
Yoast allows you to add a link back to the original article in RSS feeds. It saves your blog from plagiarism. When anyone steals your content, It helps the Google to know about the original source.
WordPress SEO for Individual Posts and Pages:
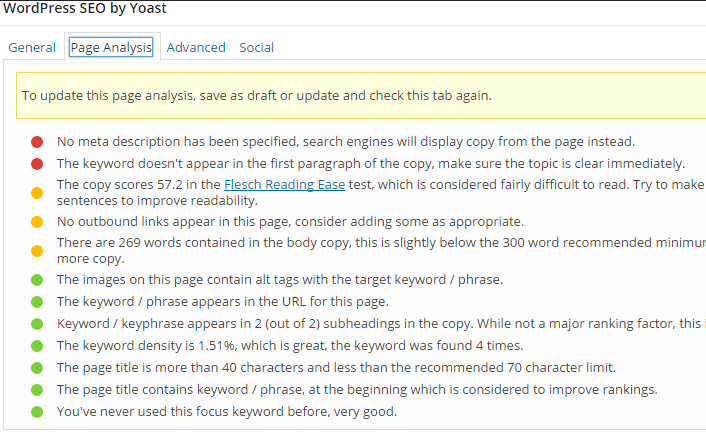
In General tab, you can see the snippet preview of your post and can set focus keyword for page analysis. Here you can add SEO Title, Meta description, and Meta keywords for individual post. In Page Analysis tab, Yoast provides analysis result on based on your focus keyword set on the General tab.
Now your WordPress Seo by Yoast Plugin set up in the right way. We hope that we covered everything in this tutorial If you have any query you can ask in the comment box.