The default WordPress Visual editor has enough buttons to create any post, But if you want to change font size, font family, inserting tables etc., There is no option in the default editor to do so. You have to use Html editor for this. The default WordPress editor is the TinyMCE Editor, which is an open source WYSIWYG (What-You-See-Is-What-You-Get) editor.
Today we will show you how to add more buttons to the default WordPress editor for the font change, insert tables.
To adding the more buttons to the default editor, you have to install the TinyMCE Advance Plugin. This plugin provides a lot of features to you default editor
How to use TinyMCE Advanced to add more buttons
First you need to install the plugin called TinyMCE Advanced. You can install TinyMCE Advanced from your WordPress Dashboard or download it from WordPress Plugin Repository.
After activating the TinyMCE Advanced, Go to Setting>>TinyMCE Advanced. Here you find extra buttons under the Unused Buttons. Just drag and drop buttons from Unused buttons section to toolbar and click on save changes.
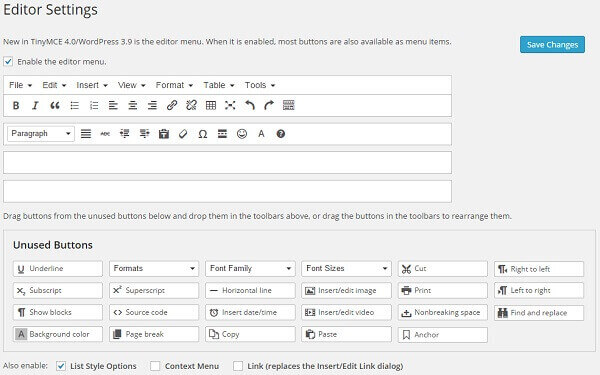
You can also remove and rearrange buttons from the toolbar by dragging. Now go to Add New Post. You will get all saved buttons to your default WordPress editor. Now you can change font size, font family, insert table and videos to your post.
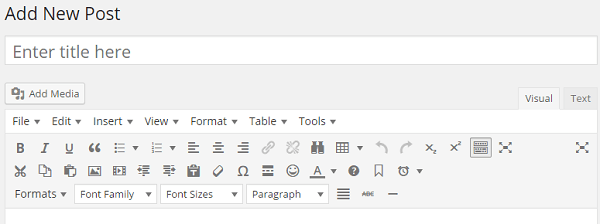
Now enjoying the enhanced WordPress post editor with more buttons to customize and style your new blog post.